Items
In this example you will learn to
Brief practice with example 4a
Register the application on PC1 using the OLM
Register the secondary computer PC2
Renew the primary registration on PC1
Renew secondary registration on PC2
Try to add a new secondary license on PC3
Move primary license from PC1 to PC3
Move secondary registration from PC2 to PC4
In this example you will learn to:
1. Save user data (Name, Company, and Email), locally on your
computer and in the OLM on your web server.
2. Manage primary and secondary licenses.
3. Moving licenses from one computer to another.
As in the previous example here also uses the advanced OLM.
Protection schemes
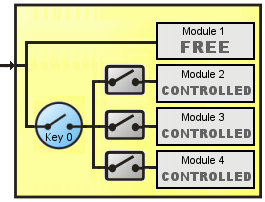
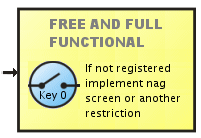
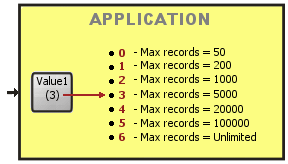
This example implements the schemes D, E and F
Scheme D
|
Scheme E
|
Scheme F
|
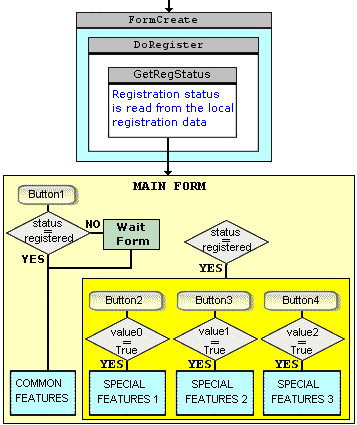
And implemented as shown in the following flowchart:
Flowchart
|
procedure TForm1.FormCreate(Sender: TObject); begin DoRegister(False); end;
function TForm1.maxrecords(n:integer):string; begin case n of 0: result:='50'; 1: result:='200'; 2: result:='1000'; 3: result:='5000'; 4: result:='20000'; 5: result:='100000'; else result := 'Unlimited'; end; end;
procedure TForm1.DoRegister(force:boolean); var F : TRegForm; begin F:=TRegForm.Create(nil); //Create the registration Form try if force or (keydata.DaysLeft < 15) then F.ShowModal; finally FreeAndNil(F); end; if (keydata.Status = Registered) then begin maxrec:=maxrecords(Values2Num(keydata.Values,2)); Button1.Enabled := (IsValueOn(keydata.Values,3,0)); Button2.Enabled := (IsValueOn(keydata.Values,3,1)); Button3.Enabled := (IsValueOn(keydata.Values,3,2)); end else begin maxrec := '50'; Button1.Enabled := False; Button2.Enabled := False; Button3.Enabled := False; Form1.wait(10); end; LRecNo.Caption := maxrec; end;
|
The version (4a): is the development version, with the utilitarian section including buttons to start the trial period and delete the registration data in order to get back the application to its original status.
The version (4b) is the definitive version where the utilitarian buttons were removed.
Brief practice with example 4a
For the practices of this example you will need four computers, that we call PC1, PC2, PC3 and PC4.
PC1 to install the application as primary with 2 authorized users.
PC2 to register as secondary, attached to primary registration on PC1.
PC3 will use to move the primary registration of PC1 to PC3.
PC4 will use to move the secondary registration PC2 to PC4.
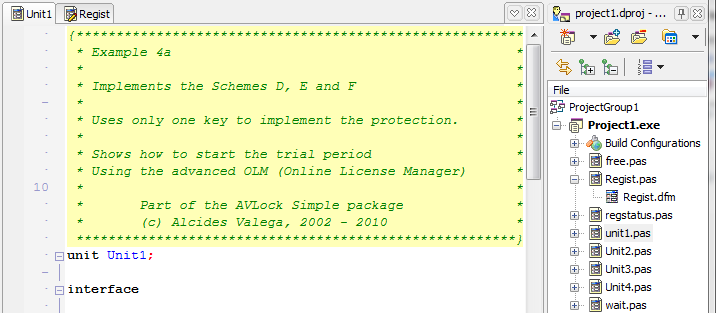
Using PC1, from the Delphi IDE Open the example 4a (\Examples\4\a)
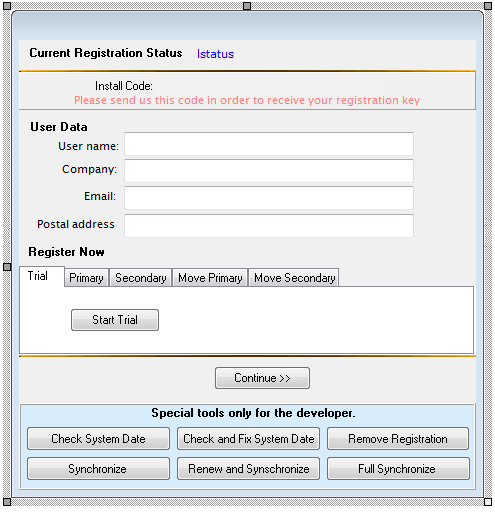
Open the Registration Form, see it below.
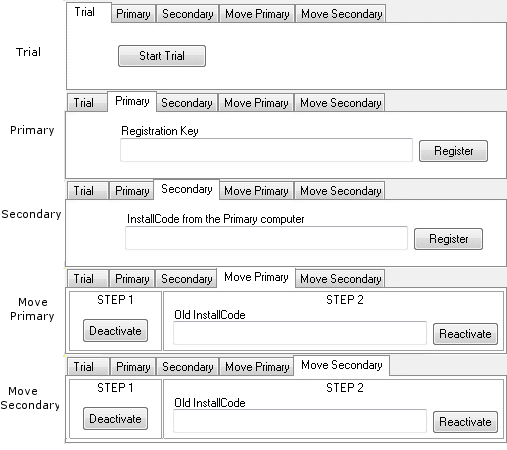
The design is similar to the example 1 but for this example the registration area is now based on a PageControl with a tabsheet for each different registration method, below you can see them deployed. In previous examples we only used the primary registration option.
Run the application on PC1
At PC1, from the Delphi IDE hit the ![]() button or type F9 to start the program. In moments you will see the registration form:
button or type F9 to start the program. In moments you will see the registration form:
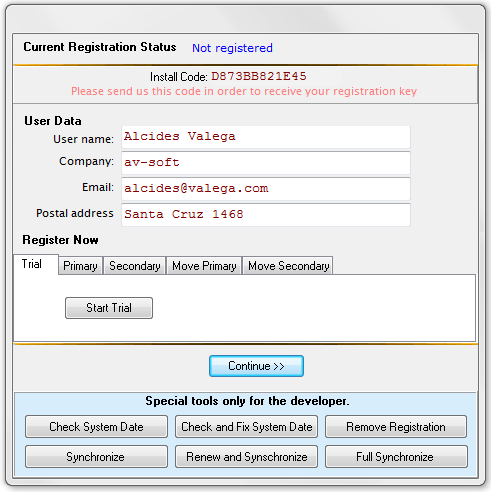
In this implementation does not start automatically trial period as suggested in the previous examples because we want to give the user the opportunity to enter your personal details, for this purpose was added a tab "Trial" with the [Start Trial] button .
As we saw, here we have several registration options. Normally, it would start a trial period and then register it as primary, but it could be that the user already has a primary installation on another computer and want to register this as secondary, then use the tab "Secondary". Also may be the user are in the instance of moving from one computer to another, then he will use "Move Primary" or "Move Secondary".
Start the trial period
Related items: How to start the trial period
The trial period starts with the following code:
res := AVLockS31.OnlineStartTrial(0,2,1,30,'037');
The parameters are:
0: Key index.
2: Authorized Users.
1: Number of simultaneous instances allowed
30: Days of the trial period.
'037 ': Field "Values".
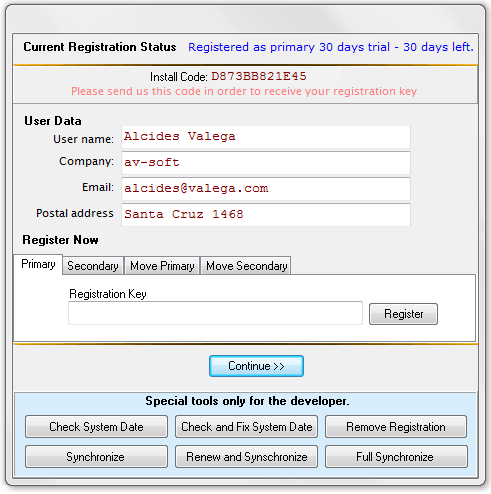
We start the trial period for PC1, first we enter User name, company and email, then we click on the [Start Trial] button into the "Trial" tab. A trial period always starts as a primary registration of type trial.
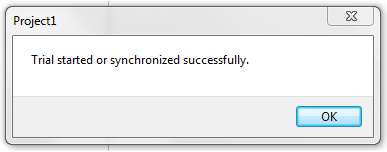
We will see the message informing us that the trial period has been established.
Now the current registration status is "Registered as Primary 30 days trial - 30 days left", see the image below:
If you click [Continue>>], will go to the main form where you will see the result of the operation, now without the countdown screen.
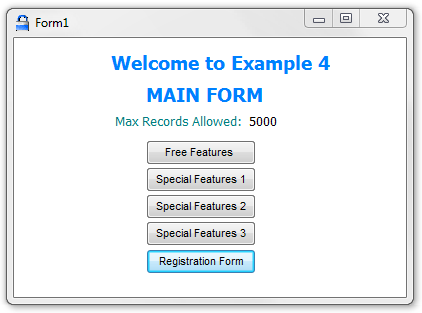
The field values '037' passed as parameter, determines the buttons that are enabled and the maximum number of entries allowed.
You can see all buttons enabled because (Value3 = 7) and also established on 5000 the maximum number of entries allowed (Value2 = 3). For more details see the above examples 5 and 6.
With the button [Show Registration Data] see the registration data:
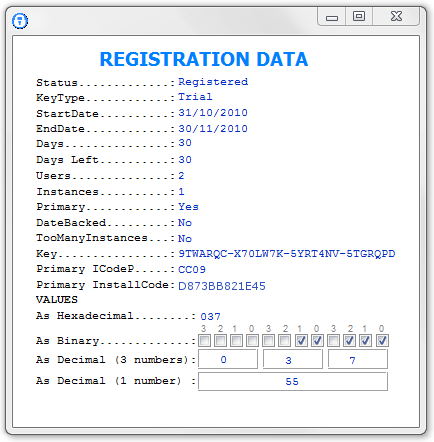
and from the control panel of the OLM, see the generated record into the web server.

For more details about how to use the control panel of the OLM see the example 3.
Register the application on PC1 using the OLM
Related Items: How to register an application using the OLM?
Clicking on the Edit icon we enter to the edition panel, then select "The user paid for a new key (Paid=Y)" then enter Values=067. Then on the last line "Temporary License allowed by 365 days". As shown below:
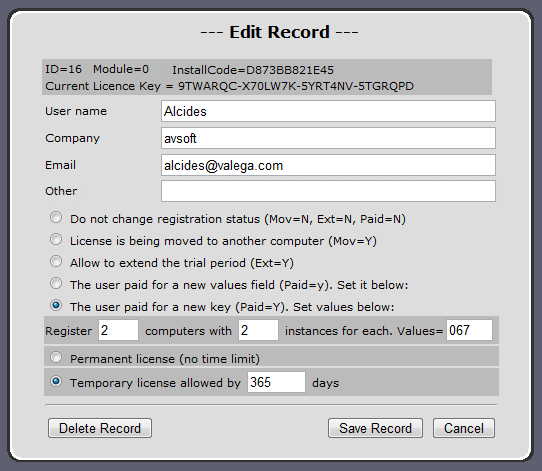
Click on the button [Save Record], then click the button [-> Go] from the main page, and you will see the changes on the record:

The fields (Users, Instances, Days and Values) are the values to create a new key and the field (Paid = Y) indicates that it must generate a new key and send it to the computer as a answer to the request made from the computer with a call to Synchronize() or OnlineRenew().
Now use the [Synchronize] button to trigger the key generation. This calls the following method:
res := AVLockS31.Synchronize(0,true);
See the changes made on the registration status after to use Synchronize().:
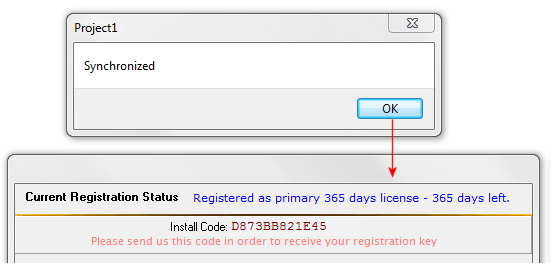
We also see the control panel with the new key generated:
this also is saved into the local registration data:
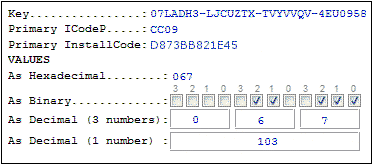
The main Form is now showing the new number of records authorized (unlimited):

Register the secondary computer PC2
Copy the project1.exe file from PC1 to a folder into PC2 and run it. You will see this starts at not registered status.
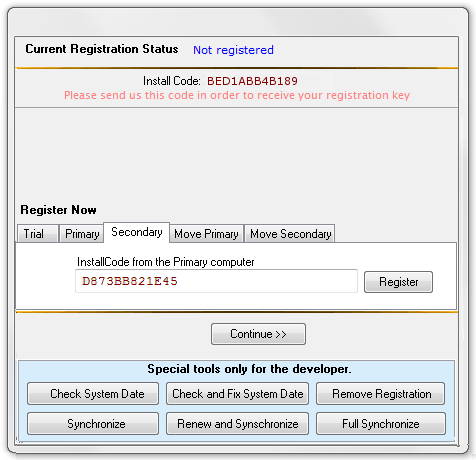
Enter user name, company and email. Then select the tab "Secondary" and enter the InstallCode from the primary registration (PC1), then click the [Register] button. In moments you will see the following message:
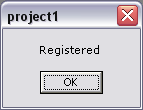
Close this message box and will see the changes made on the registration form.
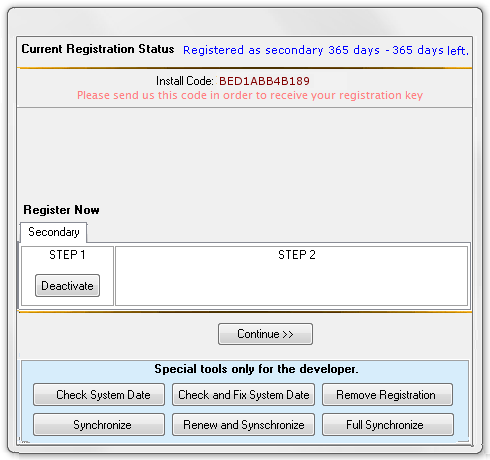
The application was registered as secondary. Consider now the main application form by clicking on [Continue >>].:
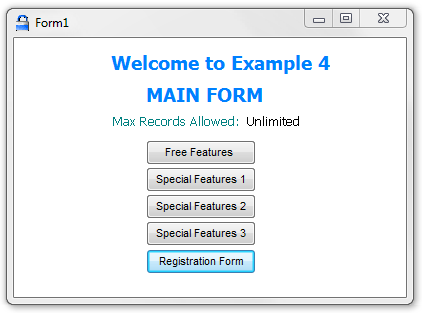
As we can see that is exactly like the computer PC1.
Now, see what has happened in the web server by entering the control panel:

We can see there the new secondary record (gray color). Note that (PR = N) define the record as secondary. The Installcode come from PC2 and the primary Installcode come from PC1.
Renew the primary registration on PC1
Related items: How to register with a registration key
Suppose the user finally decided to purchase a license and you sends it a permanent registration key generated with KeyGen to register the application. You can also register directly from the OLM, but in this case will test just how works with a key.
Let's open the KeyGen utility, then enter the data as shown below:
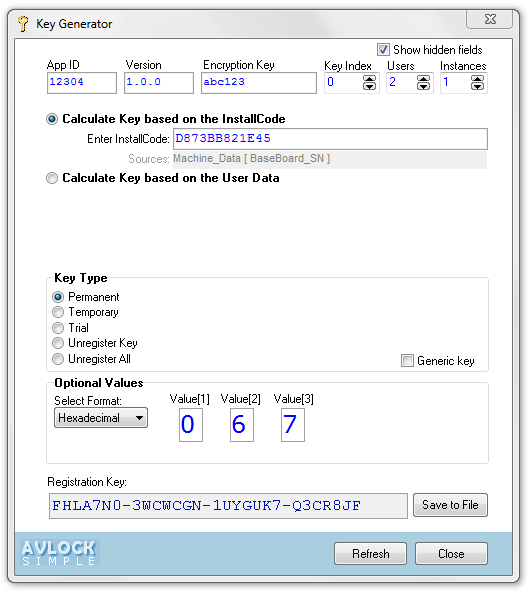
Then copy the registration key and paste it into the registration form:
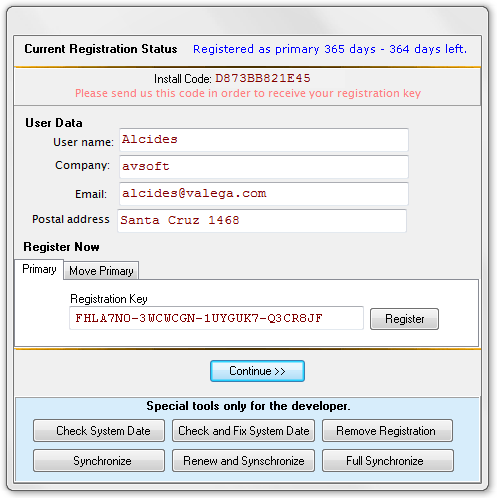
By clicking on [Register] we get the following message:
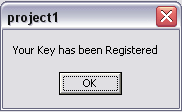
The key has been registered and the registration form now shows the new registration status:

Consider what has happened in the OLM records:

We see now that both record have the same registration key.
Renew secondary registration on PC2
If you now run the application on PC2 will see there the registration status was not changed.

While the OLM we have the new registration key the local data still remain unchanged. It happens due the GetKeyData() method gets information only from the local data.
What we need now is to synchronize local data with the OLM, for that you click on the button [Synchronize] and see the result in the picture below:

Try to add a new secondary license on PC3
Now copy the project1.exe file to a folder into PC3. We'll try to register PC3 as secondary in the same way we did in PC2. We have authorized only 2 users, therefore this test should not work because the two users have been already registered, one as primary and other secondary. However, let's test it to see what happens.
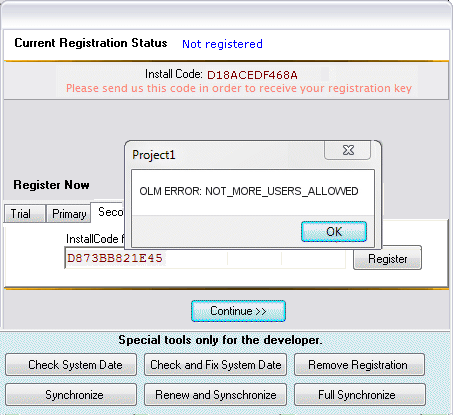
We see that it is not possible.
Move primary license from PC1 to PC3
Step 1: Deactivate the license on PC1.
Suppose that the user of PC1 want to replace his primary computer for a new one, then transfer the license from your old computer.
(PC1) to the new (PC3). To do this you must perform two steps:
The first step on PC1. We click on the [Deactivate] button of the "Move Primary" tab, then you get the message "Primary Registration Deactivated".
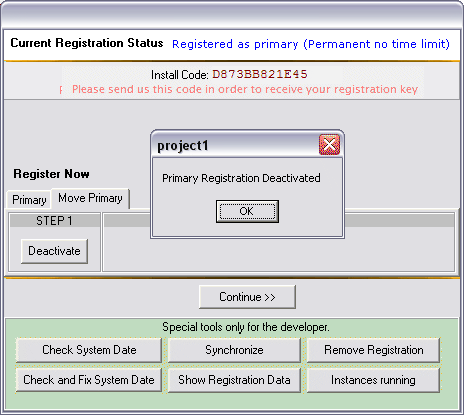
We close the message box and see that now the [Deactivate] button has changed his caption by [Restore]. This button is to return back to the previous status is in case you have clicked on [Deactivate] by mistake.
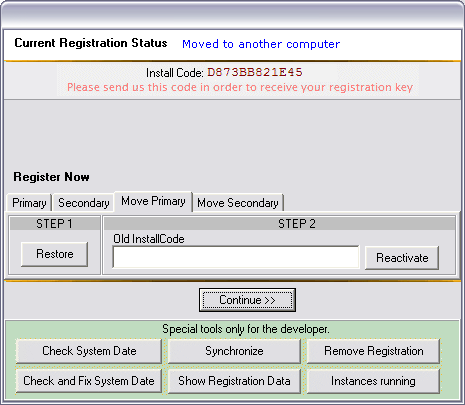
Now the primary license in the computer PC1 is disabled. If we click on [Continue>>] we have to go through the countdown.
Step 2: Activate the license on PC3.
Run the application in PC3, Enter the installcode from PC1 into the tab "Move Primary" then click on the [Reactivate] button. Below you can see the result.
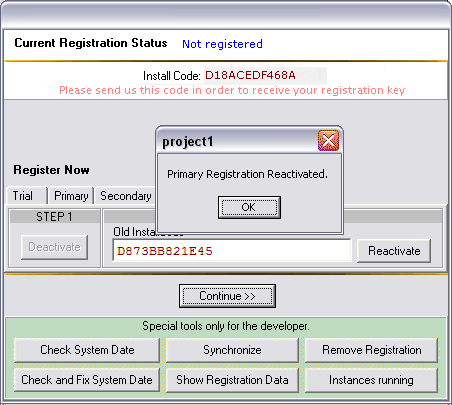
Closing the message box will see the changes made:

Now we have registered PC3 as primary computer.
Try with PC2 and see that it do not changed its status, is still working as secondary as before.
Move secondary registration from PC2 to PC4
Step 1: Deactivate the secondary license on PC2.
Assuming that the user of PC2 want to use a new computer, it can transfer the license from your old computer (PC2) to the new (PC4). To do this you must perform two steps:
The first step in PC2. We click on the button [Deactivate] into the tab "Move Secondary" and get the message "Secondary Registration Deactivated".
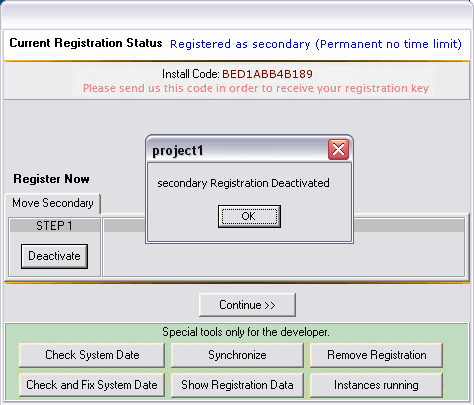
We also see that the registration status has changed:

Now the [Deactivate] button has changed his caption by [Restore]. This button is to return back to the previous status is in case you have clicked on [Deactivate] by mistake.
Step 2: Activate secondary license on PC4.
Run the application on PC4, Enter the InstallCode from PC2 into the "Move Secondary" tab, then click on the button [Reactivate]. Below you can see the result.
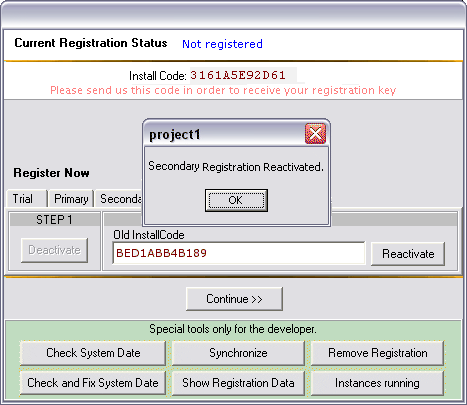
Closing the message box will see the changes made:

The secondary license has been moved from the computer PC2 to PC4.
I tried to make this help as clear and complete as possible, however they may have some issues not covered by this documentation. If you think I have missed something, or found errors, or have any idea that might be useful to improve this help, please let me know.
Alcides Valega Author of AVLock SIMPLE |
