Items
In this example you will learn to
Brief practice with example 3a
In this example you will learn to:
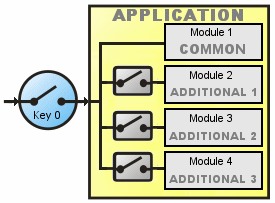
1. Using the component in a protection scheme of multiple modules (schemes C, D, E and F).
2. Manage several modules through the "Values" field.
3. View on a table all registration data of the current registered key.
4. Using the OLM control panel to manage online licensing.
Protection schemes
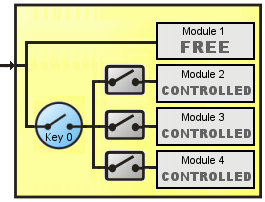
This example uses the schemes C, D, E and F
Scheme C
Scheme D |
Scheme E
|
Scheme F
|
It is implemented as shown in the following flowchart:
Source Code
procedure TForm1.FormCreate(Sender: TObject);
begin
DoRegister(False);
end;
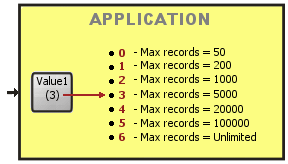
function TForm1.maxrecords(n:integer):string;
begin
result := 'Unlimited';
{$IFDEF SCHEME_F}
case n of
0: result:='50';
1: result:='200';
2: result:='1000';
3: result:='5000';
4: result:='20000';
5: result:='100000';
end;
{$ENDIF}
end;
procedure TForm1.DoRegister(force:boolean);
var F : TRegForm;
begin
F:=TRegForm.Create(nil); //Create the registration Form
try
if force or (keydata.DaysLeft < 15) then F.ShowModal;
finally
FreeAndNil(F);
end;
maxrec := 'Unlimited';
if (keydata.Status = Registered) then begin
maxrec:=maxrecords(Values2Num(keydata.Values,2));
Button1.Enabled := (IsValueOn(keydata.Values,3,0));
Button2.Enabled := (IsValueOn(keydata.Values,3,1));
Button3.Enabled := (IsValueOn(keydata.Values,3,2));
end else begin
{$IFDEF SCHEME_F}
maxrec := '50';
{$ENDIF}
Button1.Enabled := False;
Button2.Enabled := False;
Button3.Enabled := False;
{$IFDEF SCHEME_E}
Form1.wait(10);
{$ENDIF}
end;
LRecNo.Caption := maxrec;
end;
procedure TForm1.FormPaint(Sender: TObject);
begin
{$IFDEF SCHEME_C}
if (keydata.Status <> Registered) then begin
showmessage('Not Registered');
application.Terminate;
end;
{$ENDIF}
if (keydata.TooManyInstances) then begin
showmessage('Too many instances');
application.Terminate;
end;
if not AVLockS51.IsLocal and (AVLockS51.activeinstances.count < 2) then begin
showmessage('This application must be run first from the server.');
application.Terminate;
end;
end;
The scheme is similar to Example 1 but now control three special modules with the Values field.
What explained about the parameter "force" in the example 1 is also valid in this example.
Version (3a): is the development version, with the utilitarian section including buttons to start the trial period and delete the registration data in order to get back the application to its original status.
Version (3b): is the final release, where the trial period starts automatically and the utilitarian section were removed.
Brief practice with example 3a
From the Delphi IDE open the example 3a (\Examples\3\a)
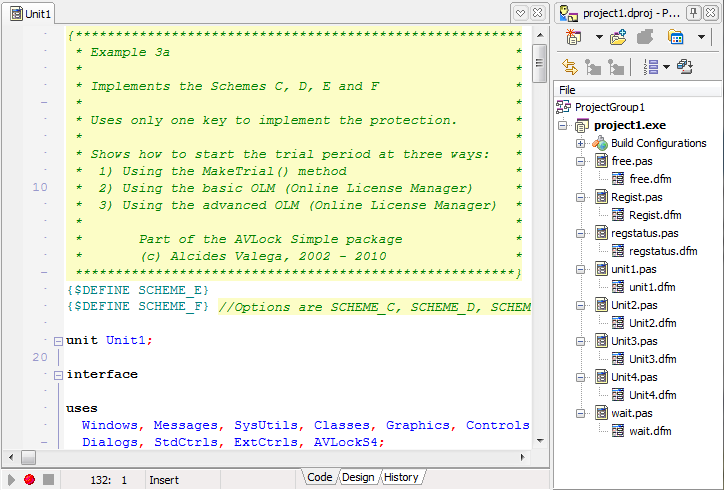
Run the application
Hit the ![]() button or click F9 to start the program. In moments you will see the registration form:
button or click F9 to start the program. In moments you will see the registration form:
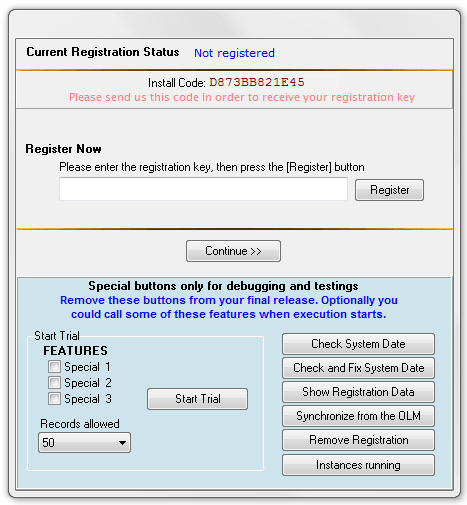
Note that the current registration status is "Not registered". This is because that for "a" versions, the trial period is not started automatically.
When you hit the [Start Trial] button, the trial period will start at three different ways according with your DEFINE directive. See the source code below:
procedure TRegForm.BtnTrialClick(Sender: TObject);
var res:string;
err:integer;
begin
if (keydata.Status = Unregistered) then
begin
res:='';
{$IFDEF NO_OLM}
//(index,users,inst,startdate,days,values)
err:=AVLock.MakeTrial(0,1,2,date,30,values);
if (err=0) then res:='00';
{$ENDIF}
{$IFDEF BASIC_OLM}
//values, kind, Index, days, inst)
res := AVLock.OnlineGetKeyB(values,0,0,30,1);
{$ENDIF}
{$IFDEF ADVANCED_OLM}
//(index,users,inst,days,values)
res := AVLock.OnlineStartTrial(0,1,1,30,values);
{$ENDIF}
if (res='00') then begin
showmessage('Trial started or synchronized successfully.');
GetRegStatus;
end else showmessage('Failed to start the trial period. Please review your internet connection and try again.');
end else if (keydata.KeyType = Trial) then showmessage('Trial already started.')
else showmessage('Application already Registered.');
end;
1. If you defined NO_OLM the trial period will starts using the method MakeTrial(). The Offline Method.
2. If you defined BASIC_OLM the trial period will starts using the method OnlineGetKeyB(). The Online Method using the Basic OLM.
3. If you defined ADVANCED_OLM the trial period will starts using the method OnlineStartTrial(). The Online Method using the Advanced OLM.
If the status is not registered then when clicking the [Continue >>] button, the behavior will be according your scheme defined, so:
1. If you define SCHEME_C, the application will terminate. See the OnPaint event manager.
{$IFDEF SCHEME_C}
if (keydata.Status <> Registered) then begin
showmessage('Not Registered');
application.Terminate;
end;
{$ENDIF}
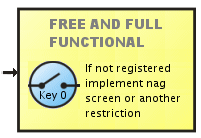
2. If you define SCHEME_E, a nag screen with a countdown will bring up before continuing.
3. If you define SCHEME_F, the number of records allowed will be limited to 50 during the trial period.
See the source code from the DoRegister procedure:
{$IFDEF SCHEME_F}
maxrec := '50';
{$ENDIF}
Button1.Enabled := False;
Button2.Enabled := False;
Button3.Enabled := False;
{$IFDEF SCHEME_E}
Form1.wait(10);
{$ENDIF}
Start the trial period
Related items: How to start the trial period
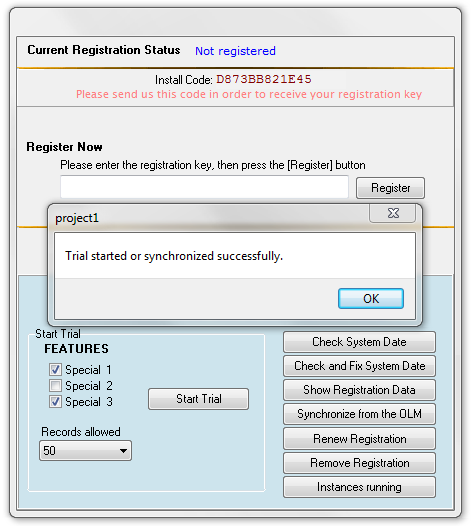
Here besides the buttons to start the trial period there are three check boxes to select the modules you want enabled during the trial.
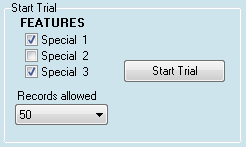
To test it select Special 1 and Special 3 and click on the button [Start Trial]. You will see a message box informing the result of the operation, "Trial started or synchronized successfully":
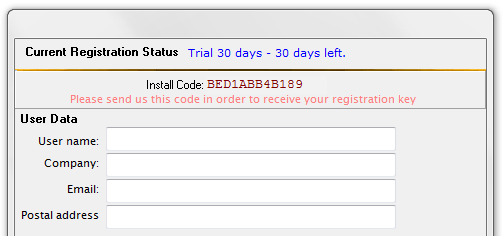
You can also see that the current registration status has changed showing the message that you see below:
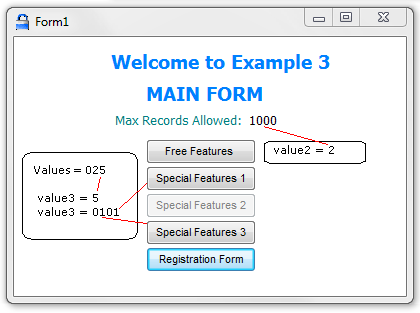
Now if you click on the [Continue>>] will go to the main application form where you will see the result of the operation performed:
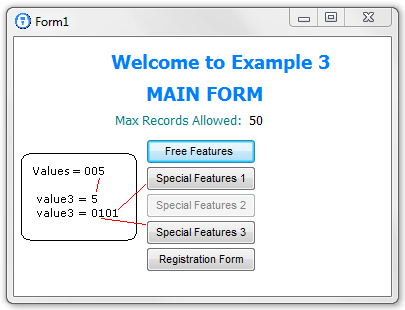
You can see there are enabled the buttons that correspond with the selected check boxes. Let us now see more details about how this was done, in the registration form now have a button [Show Registration Data], this brings you to the following screen:
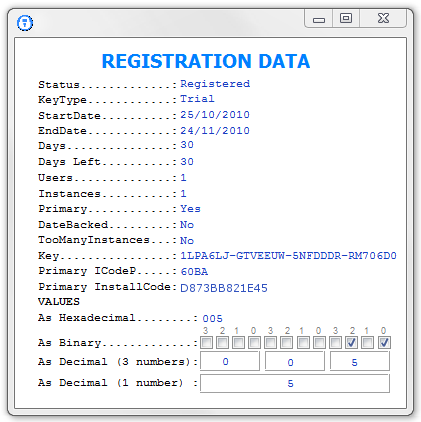
Here you can see detailed information about the registration status but what we now see in detail as regards the field Values. This is composed of 3 nibbles, a nibble is half a byte and is composed of 4 bits for a total of 3x4 = 12 bits for the Values field. On the screen we can see it represented as a hexadecimal value '005' as binary 0000 0000 0101. As we have used the bits 0, 1 and 2 of the nibble number 3 (Value3) to control access to specific modules. Here is a little source code used to calculate the Values field value based on the selected check boxes:
function TRegForm.values:string;
var val: word;
begin
val:=0;
if ch1.Checked then val := 1;
if ch2.Checked then val := val + 2;
if ch3.Checked then val := val + 4;
result := inttohex(val,3);
end;
On the val variable is calculated the value which is then allocated to the Values field.
if "Special 1" is checked, add 1 to val 1 = 0001 (binary)
if "Special 2" is checked, add 2 to val 2 = 0010 (binary)
if "Special 3" is checked, add 4 to val 4 = 0100 (binary)
By checking the boxes "Special 1" and "Special 3" we get (1 + 4) = 5
At binary view:
Special 1 = 0001
Special 2 = 0100
-------
Sum = 0101
The example 3b
Here, all utilities were removed from the registration form and the start of the trial period takes place from the OnCreate event of the main form using the StartTrial procedure whose source code is shown below:
procedure TRegForm.StartTrial;
begin
if (keydata.Status = Unregistered) then begin
{$IFDEF NO_OLM}
//(index,users,inst,startdate,days,values)
AVLock.MakeTrial(0,1,2,date,30,'007');
{$ENDIF}
{$IFDEF BASIC_OLM}
//values, kind, Index, days, inst)
AVLock.OnlineGetKeyB('007',0,0,30,1);
{$ENDIF}
{$IFDEF ADVANCED_OLM}
//(index,users,inst,days,values)
AVLock.OnlineStartTrial(0,1,1,30,'007');
{$ENDIF}
GetRegStatus;
end;
end;
We used '007 'to the Values field. The nibble 3 that use is equal to 7, in binary 0111, thus enabling the three special modules during the trial. If while the practice you started the trial period using the basic OLM with different values for the Values field, it could not be changed unless you delete the registry on the server as shown in Example 1.
Using the OLM control panel
Related Items: How to register an application using the OLM?
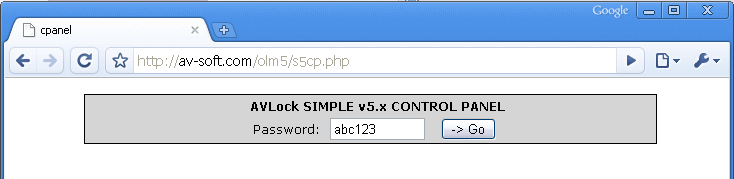
Now open the OLM control panel from a web browser (This has been tested with Google Chrome, Firefox, Opera and Internet Explorer).
Enter the URL: http://av-soft/olm3/s3cp.php
Within seconds you'll see the screen shown below. Enter the password "abc123" then click on the button [-> Go]:
We will see the screen below. Enter 12306 to "search for" and select the field "App ID", then click on the button [-> Go], It will roll records that match with the supplied AppID:

Now click on the edit icon ![]() to enter on the following box:
to enter on the following box:
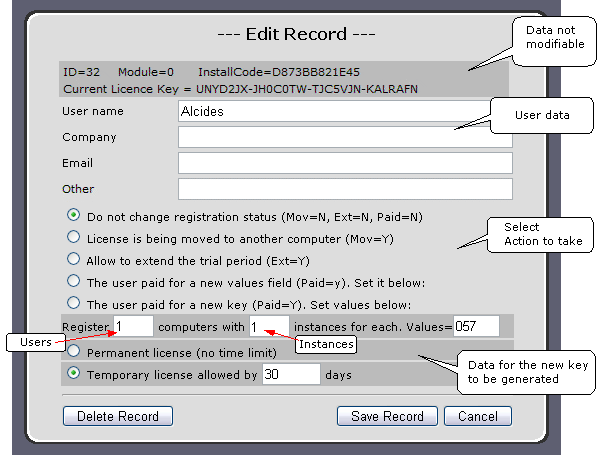
There are several sections:
Unmodifiable data: Could not be changed.
User data: Name, Company and email.
Selecting the action to take: You can choose an action to take when requesting data synchronization with the Synchronize method ().
(1) do not change registration status: If you select this option does not generate a new key and fields Moved, Extend and Paid will be equal to 'N'.
(2) License is being moved to another computer: This will set the field Moved = 'Y'. Indicating that the license of this record is being moved to another computer.
(3) Allow to extend the trial period: Sets the field Extend = 'Y' to allow the generation of a new key to extend the trial period for a further period, normally 15 days but can be changed by assigning another value to the variable $extendays in genkeys3lib.php script or passing this value as parameter.
(4) The user paid for a new field values: This sets the field Paid = y (lowercase) indicating that it must generate a new key based on the current valid key, changing only the field "Values". Useful with temporary keys in case you want to add or remove a module controlled by the field "Values" but keeping the same period authorized by the existing temporary key.
(5) The user paid for a new key: Sets the field Paid = 'Y'. The user has paid for a new key so this will generate a new key based on the data to be specified in the section below.
Data for the new key: Here is entered the data to be used to generate the new key when the field Paid = 'Y'. The generation of the new key will be triggered through the OnlineRenew() or Synchronize() methods.
Field Users: Number of users who may register using the same key, one as primary and the rest as secondary users. This should be in the range [1 .. 254].
Field Instances: Determines the maximum number of instances that can run on any computer registered.
Field Values: Field "Values" for the new key to be generated. Already explained above how use it.
Field Days: Field "Days" for the new key to be generated. In temporary keys determines the period of days allowed, the value should be in the range [1 .. 65534]. For permanent keys is automatically assigned to 65535.
Operating buttons:
[Delete record]: Deletes the current record. Not enabled in av-soft.com.
[Save Record]: Save the changes made to the current record.
[Cancel]: Closes the dialog without modifying the data.
As a practice with this screen enter the following data as shown in the image below:
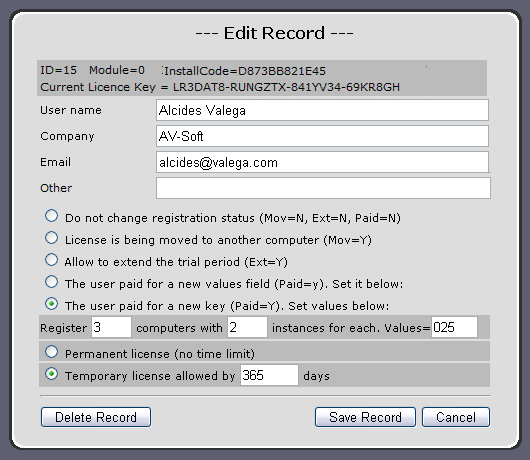
Then click on the button [Save Record] and will see the following message indicating that the record has been saved:
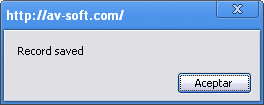
Click on [OK] to return to the control panel. Then Refresh the screen with the button [-> Go]. Now you will see the changes made.

Now click on the button [Renew Registration] into the registration form
![]()
This will generate and register a new key, into the OLM and locally. You will receive the following message:
See the new registration status:
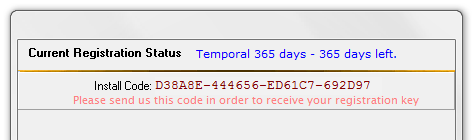
Then with [Continue>>] will see the changes made depending on the Values field: